If you are having problems with high CPU or disk usage, you may have used the Windows Task Manager to find the cause. If you notice that your Windows audio device’s graphics isolation is increasing or is persistently high in CPU utilization, it’s time to delve into the problem to find a solution. The name itself may not mean much at first, but it’s a problem that many others have faced and overcome.
When you discover the cause, you can see that CPU or disk usage returns to a more normal level.
In this article, Niketrainers.com.co will tell you:
What is Windows Audio Device Graphical Isolation?
Sounds very mysterious, right? Already from the name it can be concluded that it has something to do with computer sound. Beyond that, however, it is difficult to know exactly what the process is all about.
This process is primarily aimed at developers making controllers that can interact with the sound of the computer and add additional effects. Since this will affect all sounds coming from the computer, they need to communicate with the Windows audio service.
To help with this, Microsofthas isolated part of the audio service in a separate process, which is graphical isolation of Windows audio devices. Having a service separate from the main Windows process means a corrupted third-party audio driver won’t remove your entire operating system along with it. It also includes tools to help with DRM.
To solve the problems
Now that we know how this process works, we can apply what we learned to fix it in case it gets out of hand.
Turn off sound effects
Windows Audio Device Graphics Isolation was created to support additional sound enhancements on the computer. Therefore, if we disable the computer’s ability to play sound enhancements, it may solve the problem. This is especially handy if you don’t want to use sound enhancements on your computer. Note that this is not the same as turning off your computer’s sound, it only turns off the ability to add fancy effects like echo to it.
To turn off all sound enhancements, first right-click the speaker symbol on the taskbar and then click Sounds.

Select the Playback tab and you’ll see a list of different ways your computer plays audio. Find the default device that the computer uses to play audio. You can tell which device it is, since it is marked as “Default Device” and the green bar on the right will be lit while the sounds are playing on the computer.

Right-click it and click “Properties” or click it and click “Properties” below.

In the window that appears, go to the “Improvements” tab. You will see a list of sound effects that you can apply to your sound. Of course, we’re not here to use them, we’re here to turn them off! At the top, you should see an option to turn off all sound effects. Check it and OK on all windows.

This tells Windows you don’t want any additional sound effects, which should be a bit less of a burden on the process of isolating the graphics from your audio device.
If you don’t see the Enhancements tab, you may need to update your default sound device driver, such as Realtek.
Reinstall the audio drivers
If that doesn’t work, the problem may not be with the sound effects. Instead, it could be an audio controller that handles these effects.
To resolve this problem, first download the latest version of the audio drivers. You can do this on the computer manufacturer’s website. Alternatively, you can find your motherboard model and search for related audio drivers.
Once you’ve done this, you can install them right away (follow the instructions included with the download) and see if this fixes the problem, or perform a “clean scan” of the drivers to make sure nothing from your previous installation is getting in the way.
To do a decent search, expand “Sound, video and game controllers”, right-click the audio driver, and click Uninstall.

In the pop-up that appears, check the box asking if you want to remove the drivers and click OK.

Restart the computer. Windows will likely install audio drivers for you, but if you want to be absolutely sure you’re installing the best drivers for your computer, you can install them manually using the drivers downloaded above.
If this fixes the problem, but you experience problems with Windows audio device graphics isolation again, it may be that a Windows update has changed the driver. Repeat the above process to install the selected driver.
Check for virus
If none of the above options work, it may be a virus masquerading as Windows audio device graphics isolation process to do its bad deeds. To make sure you don’t have a virus on your hands, right-click the “Windows Audio Device Graphics Isolation” process and click “Open File Location”.

A folder will open. Check the path to the folder file. If it’s on System32, it most likely isn’t a virus.

If you are elsewhere, or you still suspect a virus is causing the problem, run a full virus scan immediately with a trusted antivirus solution.
Sound problems
With such a cryptic name as Windows Audio Device Graph Isolation, it’s hard to know how to solve it. Now, however, you know what this process does, what areas of Windows is using, and therefore how to control it if it goes wrong.
Did the above work for you? Please let us know below.


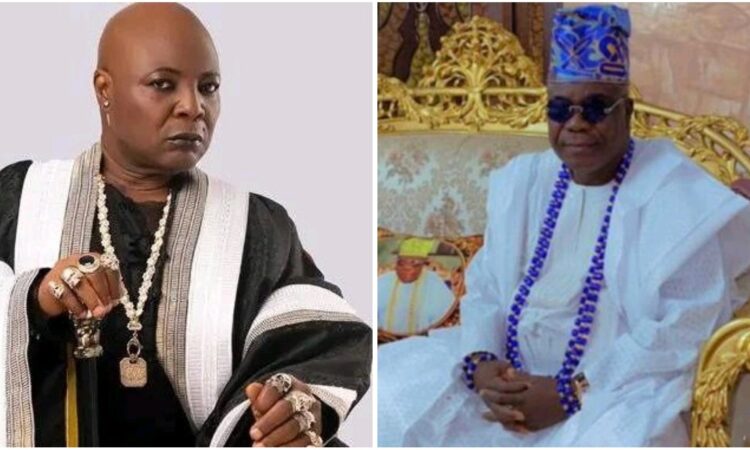


![The funeral procession for Murphy Afolabi ended at his home in Ikorodu [VIDEO].](https://niketrainers.com.co/wp-content/uploads/2023/05/Brown-Elegant-Fashion-Sale-Website-YouTube-Thumbnail-34-750x450.png)
![[VIDEO] Kolawole Ajeyemi weeps terribly over the loss of Murphy Afolabi.](https://niketrainers.com.co/wp-content/uploads/2023/05/Brown-Elegant-Fashion-Sale-Website-YouTube-Thumbnail-33-750x450.png)