Engine bay cleaning is very important. Regular cleaning stops dirt, oil, and debris from building up. This cleaning helps your engine run well and avoids many problems.

Many people think that a closed hood keeps the engine clean. In truth, a closed hood does not stop dirt. Dirt, mud, and oil can easily find their way in. Over time, these can lead to serious issues like fire hazards or even damage to mechanical parts.
Expert Note: I have worked on engines for over 20 years. I have seen that neglecting engine bay cleaning can cause unexpected engine failures and costly repairs.
Engine bay cleaning is not just about appearance. It is a vital part of car maintenance. Regular cleaning reduces the risk of electrical shorts, overheating, and corrosion.
Below is a list of reasons why you should clean your engine bay:
- Prevents fire hazards: Oil and dirt can ignite.
- Improves engine performance: Clean parts work better.
- Extends vehicle life: Regular cleaning helps parts last longer.
- Enhances safety: A clean engine bay reduces risks.
The following ordered steps outline a simple cleaning process:
- Park your car on a flat surface.
- Let the engine cool.
- Secure all caps and hoses.
- Rinse the engine bay with a hose.
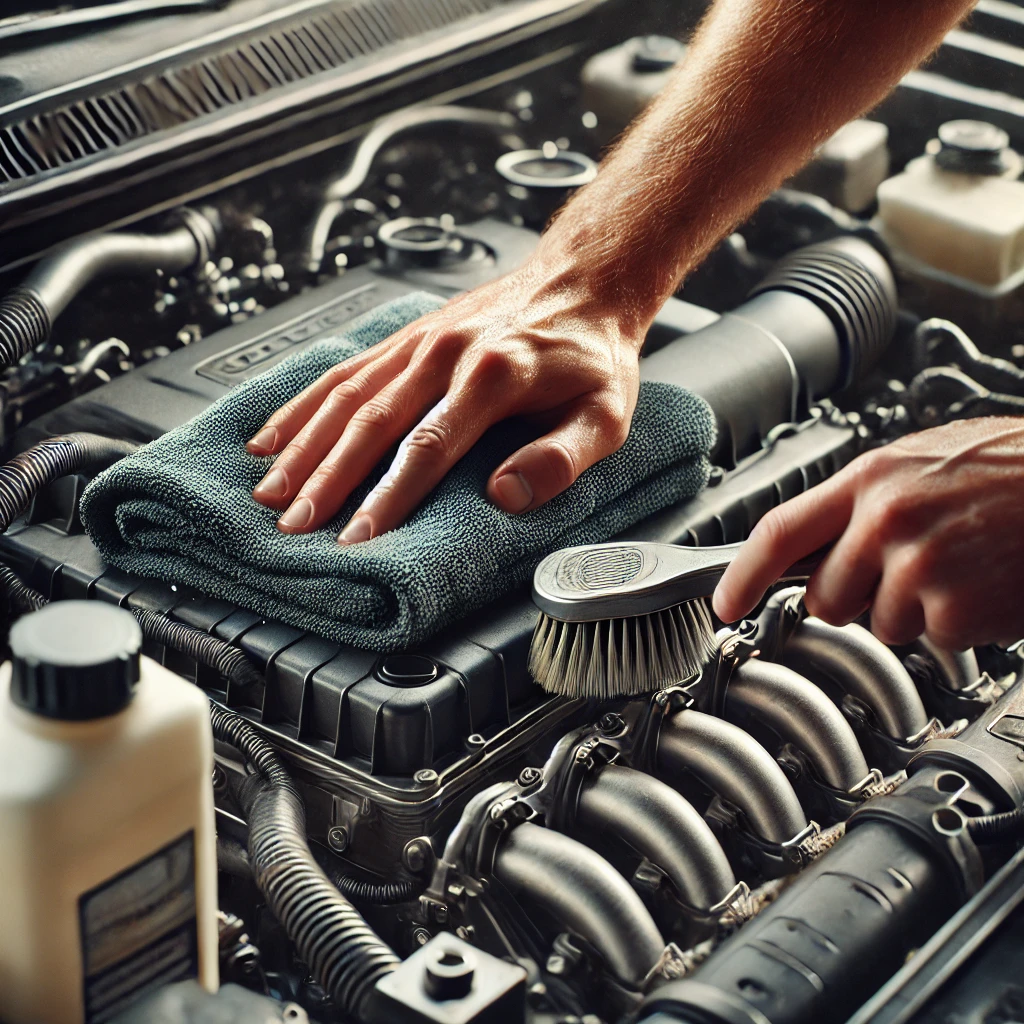
- Clean the components with a soft brush and car wash soap.

Keeping your engine bay clean prevents many problems. Regular cleaning is an essential part of car maintenance. The steps are straightforward and can be done by anyone with basic tools. This approach makes sure your engine works safely and efficiently for years to come.
Why You Should Clean Your Engine Bay
Your engine bay is like the heart of your car. It keeps everything running smoothly. However, over time, dirt, oil, and debris build up. If ignored, this can cause serious problems. Keeping the engine bay clean is not just about looks. It helps maintain performance, extends the life of your vehicle, and prevents potential hazards.
Preventing Dirt and Oil Buildup
Engines are not sealed from the environment. Even with the hood closed, dust, mud, and road grime can find their way in. Oil leaks and coolant spills also contribute to a dirty engine bay. Over time, this buildup can harden, making cleaning more difficult.
A clean engine bay:
- Prevents rust and corrosion.
- Reduces bad odours caused by oil and grease.
- Makes it easier to spot leaks before they turn into big problems.
Expert Advice: I once worked on a car where thick grease covered a cracked hose. The owner never noticed it. When the hose finally split, the car overheated. A simple cleaning routine could have prevented the issue.
Avoiding Performance Issues
A dirty engine bay is not just an eyesore. It can affect performance in many ways.
- Cooling problems – Dirt blocks airflow around the radiator and engine, causing overheating.
- Electrical faults – Grease and grime can trap moisture, leading to short circuits.
- Belt and pulley wear – Oil buildup weakens rubber parts, causing cracks and slipping.
Regular cleaning keeps components in top shape. Engines run more efficiently when free from dust and grime.
Enhancing Vehicle Lifespan and Resale Value
A well-maintained car lasts longer. Regular engine bay cleaning:
- Protects hoses and wiring from premature wear.
- Prevents early engine failure by reducing buildup-related damage.
- Increases resale value – A clean engine bay looks well cared for, making buyers more confident.
When selling a car, first impressions matter. A spotless engine bay tells buyers that the car was properly maintained.
Improving Safety by Reducing Fire Risks
One of the biggest risks of a dirty engine bay is fire. Oil and grease are highly flammable. If they come into contact with a hot surface or a faulty wire, they can ignite.
Fire Risk Factors in a Dirty Engine Bay:
🔥 Oil leaks – Can drip onto hot engine parts.
🔥 Old wiring – Dirt and oil make wires more prone to sparks.
🔥 Leaf and debris buildup – Dry materials near the exhaust can catch fire.
Cleaning the engine bay helps eliminate these risks. It keeps your car safer for you and your passengers.
A clean engine bay prevents costly repairs and ensures safety. Regular cleaning removes harmful buildup, improves performance, and extends your car’s lifespan. It also reduces fire risks and enhances resale value.
Pro Tip: Clean your engine bay every 3 to 6 months for best results.
Common Dirt, Debris, and Fluids Found in an Engine Bay
Your car’s engine bay is constantly exposed to dirt, fluids, and grime. Even with the hood closed, contaminants find their way inside. Over time, these build up, affecting performance and even causing damage. Below are the most common substances found under the hood and why they matter.
🛞 Dirt and Mud
Dirt and mud are among the most frequent contaminants. They come from:
- Daily driving, especially in dusty or sandy areas.
- Off-road adventures, where mud and gravel get thrown up.
- Potholes and puddles, splashing grime into the engine bay.
Why it matters:
- Mud can trap moisture, leading to rust and corrosion.
- Excess dirt may clog air filters and reduce performance.
- Thick layers of grime make it harder to spot leaks or other issues.
📌 Expert Tip: If you drive on dirt roads often, inspect your engine bay weekly. A simple wipe-down can prevent buildup.
🛢️ Engine Oil
Oil leaks happen more than you think. Common causes include:
- Worn-out gaskets and seals that let oil seep out.
- Spills during oil changes, especially if you don’t use a funnel.
- Cracked or loose hoses, which can spray oil across the engine.
Why it matters:
- Oil buildup attracts dirt, forming a thick, sticky grime.
- If it reaches hot parts, it could smoke or even catch fire.
- Over time, rubber parts and hoses deteriorate when coated in oil.
📌 Expert Tip: If you see fresh oil in your engine bay, check your oil levels immediately. A small leak can turn into a big problem fast.
⚙️ Transmission Fluid
Transmission fluid leaks aren’t as common, but when they happen, they can be serious. Causes include:
- Damaged transmission cooler lines, which can rupture.
- Worn-out seals, leading to slow leaks.
- Overfilled or overheating transmission, pushing fluid out.
Why it matters:
- If fluid sprays onto a hot engine, it can burn and create a strong smell.
- Transmission fluid is slick, making hoses and belts slip.
- A sudden leak could mean a transmission failure is near.
📌 Expert Tip: If you see red or brown fluid in your engine bay, check under the car as well. A leak might be worse than it appears.
🛑 Brake Fluid
Brake fluid sits in the master cylinder, usually near the back of the engine bay. Spills or leaks happen due to:
- Cracked hoses or seals failing.
- Topping up the reservoir and accidentally spilling.
- Brake system damage, leading to leaks near connections.
Why it matters:
- Brake fluid is highly corrosive and can damage paint and rubber parts.
- Leaks might mean reduced braking power, a serious safety risk.
- If fluid levels drop too low, your brakes could fail entirely.
📌 Expert Tip: If you see yellowish fluid near your brake master cylinder, get it checked. Never ignore a brake fluid leak—your safety depends on it.
🌡️ Coolant
Coolant keeps your engine from overheating. However, it can leak due to:
- Radiator failure, causing it to spray when pressure builds up.
- Cracked hoses, letting coolant drip onto hot parts.
- Overheating incidents, leading to coolant boiling over.
Why it matters:
- Hot coolant can scald your skin if touched.
- Leaks reduce cooling efficiency, leading to engine overheating.
- Coolant is toxic to pets, so clean spills immediately.
📌 Expert Tip: If your coolant level drops frequently, check for leaks. A slow loss may indicate a head gasket issue, which can be costly if ignored.
Step-by-Step Guide to Cleaning an Engine Bay
Cleaning your engine bay is a practical task that anyone can do with a bit of care. This guide explains every step in clear, simple language. The following instructions help you work safely and efficiently. Each step is explained in short, easy-to-read sentences.
Step 1: Preparation
Before you start, make sure you are ready.
- Park on a flat surface. This helps you work safely and avoid spills.
- Let the engine cool completely. Hot parts can burn you or damage the cleaning tools.
- Ensure all caps and hoses are secured. This stops water from getting into places it should not.
A personal note: I once cleaned my engine bay on a busy road. I quickly learned that a flat, quiet place is much better. For more details on safety, see Essential Tools and Supplies.
Step 2: Initial Rinse
Start by removing loose dirt.
- Use a low-pressure stream of water. This gently washes away dust and grime.
- Avoid directly spraying electrical components. Sensitive parts can get wet and stop working properly.
Step 3: Applying Soap/Degreaser
Now it is time to add a cleaning agent.
- Choose a gentle, automotive-approved cleaner. This soap is made for car parts and will not harm them.
- Apply with a soft brush or sponge. A soft tool helps to protect delicate surfaces.
A quick tip from experience: I prefer using a diluted degreaser when my engine bay has heavy oil buildup. Always test on a small area first.
Step 4: Scrubbing and Wiping
After the soap works on the dirt, scrub the engine bay.
- Wipe large components with microfiber towels. These towels absorb water quickly and leave no lint.
- Use a toothbrush for tight spaces. This small brush reaches corners and crevices where grime hides.
For clarity, here is an ordered list of scrubbing tips:
- Focus on one area at a time.
- Be gentle to avoid damage.
- Check each component for remaining dirt.
A personal observation: When I scrub, I listen to music to keep my pace steady. It also helps me enjoy the process.
Step 5: Rinsing and Drying
Finish by rinsing off all the soap and debris.
- Rinse thoroughly with a hose or a low-pressure pressure washer. This removes all cleaning agents.
- Dry with microfiber towels or an air blower. Drying prevents water spots and rust.
Below is a simple graph that shows the cleaning progress:
Cleaning Progress
- Preparation – 20%
- Initial Rinse – 20%
- Soap/Degreaser – 20%
- Scrubbing – 20%
- Rinsing & Drying – 20%
This graph breaks down the task into equal parts, making it easier to understand.
Expert Advice and Final Thoughts
From years of experience, I recommend always checking for any missed spots after drying. A quick review prevents future problems. I have learned that small oversights can lead to long-term issues.
- Always inspect your work.
- Repeat any steps if needed.
- Keep your tools clean for next time.
Following these steps keeps your engine bay in excellent condition. By using simple methods and the right tools, you protect your car and enjoy a reliable ride.
Pro Tips for a Spotless Engine Bay
A spotless engine bay not only looks neat but also helps your car run smoothly. I have spent many years working on cars, and I have learned a few simple tricks that make all the difference. Here, I share expert advice in a way that is easy to understand.
Always Wash When the Engine is Completely Cool
It is very important to let your engine cool down.
- Safety first: Hot parts can burn you or damage your cleaning tools.
- Better results: Cold surfaces hold soap better.
I remember a time when I tried cleaning my engine while it was still warm. I ended up with uneven cleaning and a few minor burns. Always wait until the engine is cool before starting.
Use the Two-Bucket Method
Using two buckets stops you from reintroducing dirt.
- Fill the first bucket with soapy water.
- Fill the second bucket with clean water.
- Tip: Dip your cleaning brush in the soapy bucket and then rinse it in the clean water before going back to the soapy mix.
- Result: Your tools stay cleaner and you do not spread old dirt around.
This method has helped me achieve a truly clean engine bay, free of stubborn grime.
Wear Scratch-Free Clothing
Protecting your car is as simple as choosing the right clothes.
- Soft fabrics only: Avoid rough materials like denim with metal parts.
- Prevents scratches: Your car’s surfaces remain safe from small abrasions.
I learned this trick early in my career. Once, I used a rough cloth by accident. My mistake left tiny marks on the plastic. Now, I always wear soft, lint-free clothing.
Be Mindful of Electrical Components
Electrical parts in your engine bay need special care.
- Cover them if needed: Use plastic bags or specialised covers.
- Avoid water exposure: Extra water near these parts can cause issues later.
Always check the wiring and connectors before starting. I often cover delicate components with a light cloth. This extra step has saved me from several headaches.
Visual Guide: Pro Tips Summary
Below is a simple graph that summarises the pro tips:
Pro Tips Summary
- Wait until the engine is cool.
- Use two buckets for cleaning.
- Wear soft, scratch-free clothing.
- Cover electrical components.
This graph helps you remember each tip clearly. You can refer back to it whenever you clean your engine bay.
Additional Expert Advice
Here are a few extra tips that only come with experience:
- Plan your time: Cleaning an engine bay should not be rushed.
- Double-check: Always inspect your work after drying.
- Maintain your tools: Clean brushes and towels last longer.
Video Guide for First-Timers
Watching a video can help you learn how to clean your engine bay. In this section, I share a useful video tutorial that shows each step clearly. The video is designed for beginners and explains everything in a simple way.
Watch the Video Below:
This video uses short sentences and clear images. It shows each step in the process, so you do not miss any detail. I have used this method myself when I first learned to clean my engine bay. It made the learning process straightforward and enjoyable.
Key Techniques Highlighted in the Video
Below are some key techniques that the video demonstrates:
- Preparation:
- Park on a flat surface.
- Let the engine cool.
- Secure all caps and hoses.
- Initial Rinse:
- Use a low-pressure water stream.
- Avoid spraying electrical parts directly.
- Applying Soap/Degreaser:
- Use a gentle, approved cleaner.
- Apply with a soft brush or sponge.
- Scrubbing and Wiping:
- Wipe larger areas with microfiber towels.
- Use a toothbrush for small spaces.
- Rinsing and Drying:
- Rinse off the soap thoroughly.
- Dry with microfiber towels or an air blower.
Additional Information for Beginners
I encourage you to check our Step-by-Step Cleaning Guide for more detailed instructions. Each step in the video is supported by clear text explanations on our website. This approach has helped many of my readers understand the process better.
Expert Advice and Personal Anecdotes
I remember my first time cleaning an engine bay. I felt unsure about each step. I learned to take my time and focus on safety. This video has been a great help in clarifying those steps for me. Now, I clean my engine bay with confidence. I share these techniques because I want you to learn from my experience.
Using a video guide along with text can make the learning process smoother. The visual aid reinforces what you read. This method works well for beginners and experts alike.
This guide is written to be simple and clear. I hope you find the video and the highlighted techniques useful. The aim is to help you complete the task without stress. Enjoy watching and learning, and feel free to leave comments if you have any questions!
FAQs About Cleaning an Engine Bay
Cleaning an engine bay raises many questions, especially for those new to the process. Below are clear, expert-backed answers to some of the most common concerns.
1. How Much Does It Cost To Clean an Engine Bay?
The cost of cleaning an engine bay depends on whether you do it yourself or have it professionally done.
- DIY Cleaning: Typically, you will spend around $15 to $20. The main expenses include car wash soap, a degreaser, and microfiber towels. If you already own a hose or pressure washer, the cost stays low.
- Professional Cleaning: Some auto detailing services charge between $50 and $100, depending on the level of detail required.
From personal experience, DIY cleaning is cost-effective and satisfying. I once paid for a professional service, but the result was no better than what I could achieve at home with basic supplies.
For a list of essential tools, see our guide on Tools and Supplies for Engine Bay Cleaning.
2. Is It Safe To Spray an Engine with Water?
Yes, spraying an engine bay with water is generally safe. However, you must take precautions to protect sensitive parts.
- Use low water pressure. High pressure can push water into electrical components.
- Avoid spraying directly on the alternator, battery terminals, or exposed wiring. Cover these areas if necessary.
- Let the engine dry completely before starting the car. This helps prevent short circuits.
Most modern engine bays are designed to handle water exposure. After all, they get wet from rain and road splashes. However, careless spraying can cause issues. I once saw a car fail to start because water got into an old spark plug connection. A simple cover would have prevented this.
For detailed washing techniques, read our Step-by-Step Guide to Cleaning an Engine Bay.
3. Can I Use a Pressure Washer?
Yes, but it must be used carefully. A pressure washer can be both helpful and harmful.
- Keep the pressure low. Too much force can damage plastic parts, electrical connectors, and hoses.
- Maintain a safe distance. Holding the nozzle at least 2–3 feet from the engine bay prevents unnecessary impact.
- Angle the water flow. Spray at an angle rather than directly at components to prevent water from seeping into sensitive areas.
Here is a simple graph showing the risk levels of different water pressures:
Water Pressure Risk Levels
- Low Pressure (Safe) ✅
- Medium Pressure (Use Caution) ⚠️
- High Pressure (Dangerous) ❌
I once used a high-pressure washer without thinking. It caused a loose wire to disconnect, leading to an unexpected repair. Since then, I always double-check pressure settings before cleaning.
Conclusion: Keeping Your Engine Bay Clean for a Healthier Car
Maintaining a clean engine bay is not just about appearance—it plays a big role in your car’s health. Over time, dirt, oil, and grime build up, causing potential problems. A clean engine bay helps prevent overheating, reduces fire risks, and makes it easier to spot leaks before they turn into costly repairs.
Many car owners overlook this part of maintenance, but a little effort goes a long way. Cleaning your engine bay regularly can extend the life of components, keep electrical parts safe, and even improve resale value. Whether you do it once every few months or as part of your routine car wash, it’s a habit worth developing.
Make Engine Bay Cleaning a Regular Practice
- Prevention is better than repair. A dirty engine bay can lead to clogged components, overheating, and hidden leaks.
- It takes less time than you think. With the right tools, a full cleaning can take just 30 minutes.
- Your future self will thank you. Keeping it clean means fewer surprises during inspections or servicing.
What’s Your Go-To Cleaning Method?
Have you cleaned your engine bay before? Do you have a favourite product that works wonders? Share your experience in the comments or let us know your top engine cleaning tips.